Abiquiu News
  • Home
    • News 05/02/2025
    • News 04/25/2025
    • News 04/18/2025
    • News 04/11/2025
    • News 04/04/2025
    • News 03/28/2025
    • News 03/21/2025
    • News 03/14/2025
    • News 03/07/2025
    • News 02/28/2025
    • News 02/21/2025
    • News 02/14/2025
    • News 02/07/2025
    • Criteria for Submissions
  • News and Features
  • Dining
  • Lodging
  • Arts
  • Bloom Blog
  • Activities / Classes
    • Birding
  • Tech Tips
  • Classifieds
  • Real Estate
  • Real Estate by Owner
  • Support
Picture

Vegan Chocolate Cherry Cake

11/21/2019

0 Comments

 
Picture
Jessica Rath
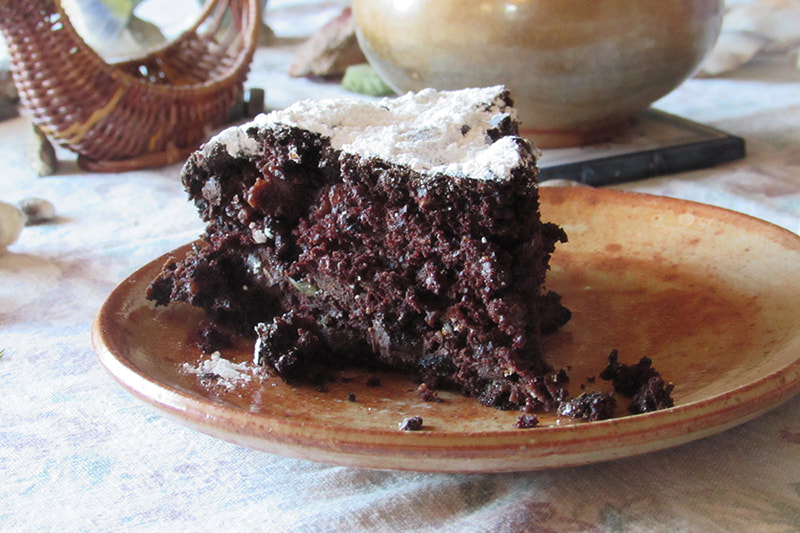
​I know of three other vegans in the Greater Abiquiu Area. I bet there are many more people who are curious and would like to give it a try, if they had some guidance and inspiration. For example, my baking skills greatly improved after I learned about this fantastic egg substitute: Mix 1 tablespoon ground flax seed with about 3 - 4 tablespoons of water in a small cup (it should be quite liquid) and let sit for 5 minutes or so. It will become quite gelatinous. Use whenever a recipe asks for 1 egg; increase flax/water amount accordingly when more eggs are required.

This rich, moist, chocolaty cake may be the perfect addition to your Thanksgiving Dinner; it is delicious!
 
Vegan Chocolate-Cherry Cake
Dry ingredients:
2 c flour
½ rolled oats
pinch of salt
1 TS baking powder
½ TS baking soda
2/3 c unsweetened cocoa powder
1 c chopped walnuts
1 c  vegan chocolate chips (Trader Joe’s)

Wet ingredients:
1 TS ground flax seed, mixed with some water
½ c vegetable oil
¾ c brown (organic) sugar
1 c soy milk
1 c juice from cherries
1 tea spoon vanilla
1 glass jar canned cherries (Trader Joe’s)

Mix first 8 dry ingredients in a larger bowl.
In a smaller bowl, beat oil and sugar with a wire whisk until sugar is dissolved. Add flax-seed mix, vanilla, and soy milk. Empty the cherries into a strainer over a small bowl, saving the juice. Add 1 c of juice (or more) to liquid mix.

Prepare baking form: rub a bit of vegan butter onto bottom and sides of a spring form, then dust with flour. Pre-heat oven to 350 degrees F. Pour liquid mix into dry ingredients, mix well, then add the cherries. It should have the consistency of thick mud; add a bit of juice or milk if too dry. Pour into spring form.

Bake about 50 - 60 min., test that it’s done. Let cool a bit, then open the spring on the side of the form so that cake can cool. I always cover everything with a clean white cotton cloth, to absorb any moisture.

Sprinkle organic powdered sugar on top, or – use vegan whipping cream! Or – use vegan Cool Whip, available at Sprouts in Frozen section.
0 Comments

Turkey Carcass Soup

11/15/2019

0 Comments

 
Picture
​One of the best things about our traditional American Thanksgiving dinner is the choice of leftovers and the creative uses to which such leftovers can be put.  Thanksgiving evening, shortly after we think, “I can’t eat another thing,” we may find ourselves heading to the kitchen and opening the fridge to see what would make a quick snack.  For me, that is usually a leftover biscuit split in half, dabbed with mayo, and filled with a small piece of cold turkey and topped with a spoonful of cranberry sauce.
 
My favorite leftover, however, is Turkey Carcass Soup.  Making it also clears out the fridge a bit.  Though not as rich as a traditional bone broth because the turkey bones have given up most of their goodness during the roasting process, this soup is satisfying because of the addition of fresh vegetables, frozen corn, and wild rice.  It became even more filling the year I decided to make croutons from leftover stuffing.
 
The morning after Thanksgiving, while the Turkey Carcass Soup was simmering gently on the stove, perfuming the whole house, and working up appetites for lunch, I was rearranging the fridge.  “What can I do with all this leftover stuffing?” I wondered.  I transferred it to a large rectangular baking dish and baked it until crisp and cut it into small squares for topping the soup.  Ever since, these croutons have been part of this soup recipe, which I hope you will try this Thanksgiving.
A New Mexico friend—when she lived on a small farm in Michigan—threw a star-gazing party most every August during the Persied Meteor Showers.  Friends from several states would arrive in campers and trucks loaded with food.  One year, three turkeys were brought—my smoked turkey, a roasted turkey, and one made on site on a Weber grill.  After a long, sumptuous outdoor feast and lots of oohs and aahs as we watched the meteors, several women gathered in the farm-house kitchen and began stripping the turkey carcasses of meat, and all during the night a large stock pot simmered with turkey bones and meat and lots of vegetables.  The first person to waken was expected to enter the kitchen and turn on the huge coffee pot already filled with water and coffee.  As I crawled out of my pup tent, I realized I was the only person there to see the sun rise.  Walking up the steps to the kitchen, I was overwhelmed with the smell of turkey carcass soup.  Sometimes I think I can still smell it.  Yes, I know I can!
​dressing (stuffing) left
   over from turkey dinner
butter
​After turkey dinner, place leftover dressing into a buttered large rectangular baking dish.  Pat down to an inch in height.  Cover/refrigerate until soup is in process.
​3 tablespoons salt
1 tablespoon black pepper
2 tablespoons sage
10 cups cold water
​Throw seasonings into a large stockpot.  Add water and bring to a boil.
​1 large onion, diced
1/2 stalk of celery, diced
   and including leaves
1 handful of flat-leaf
   parsley leaves, chopped
6 large carrots, peeled and
   cut into 1/2-inch ‘sticks’
carcass of 1 roasted
   turkey, stripped of meat
​When water comes to a boil, add remaining ingredients; return to a boil; then, lower heat and simmer for 2 hours.  While soup is simmering, dice left-over turkey; set aside.  While soup is simmering, cut cold dressing in baking dish into 1/2-inch dice.  Bake in preheated 375-degree F oven until brown on top.  Remove from baking dish and separate into croutons.  If croutons are not crisp on bottom, return loosened croutons, a half batch at a time, to oven to finish browning.  Remove from oven; set aside.  While soup is simmering, prepare wild rice (see below).
​1 cup wild rice, rinsed
   and drained
3 cups water
1/2 teaspoon salt

Put all ingredients into a medium saucepan; bring to a boil; stir.  Lower heat to very low; lid the pot; let wild rice absorb all of the liquid (takes 45 to 60 minutes).  Set aside.  Chicken or vegetable stock can be substituted for water.
​the diced, left-over turkey
cooked wild rice
1 cup frozen corn
​At end of 2-hour cooking period, retrieve and discard turkey carcass.  Incorporate diced turkey, wild rice, and frozen corn, stirring well.  Cook for an additional 10 minutes.  Remove soup from heat.  Note:  Adding a little turkey bouillon at this point intensifies the flavor of this soup.  Recommended:  Better than Bouillon Turkey Base.
​flat-leaf parsley, chopped
baked dressing croutons
Pour soup into a tureen or into individual soup bowls.  Garnish with parsley.  Pass croutons in a separate bowl.  Serve immediately.

EnJOY
0 Comments

Linguine with Prosciutto and olives

11/8/2019

0 Comments

 
Julie Talatinian via Carol Bondy
From “Sunset Less Than 7 Ingredients” via Mary Helen Bondy
 
The first time I remember having this at my mother in law Mary Helen’s and she made it with Spaghetti Squash instead of the Linguine in deference to Brian’s gluten free diet.   Since then I’ve had it with Linguine and Rice noodles but my favorite remains the Spaghetti Squash.  But really the sauce is so delicious you can put it on anything!

8 oz Linguine or Spaghetti (or 1 Spaghetti Squash)
1/3 lb thinly sliced prosciutto, cut into 1/4 “ strips (or packaged chopped prosciutto)
¼ cup olive oil
½ cup thinly sliced green onions with tops
3 oz jar pimiento stuffed green olives drained and chopped
1 cup chopped tomatoes
           
Cook Pasta al dente, Drain and place in a warmed bowl or Poke holes in spaghetti squash and cook at ….. for one hour
 
Meanwhile, combine prosciutto and oil in a large frying pan.   Cook, stirring over a medium high heat until proscuitto is lightly browned (approximately 3 minutes.)   Add onions and cook, stirring until limp (the onions, not you) (approximately 2 minutes)   Add olives and tomatoes and cook, shaking pan often, until olives are hot (approximately 2 minutes)
 
If using spaghetti squash, bake until soft, remove seeds and with a fork scrape out the “noodles” into a bowl.   Pour prosciutto mixture over noodles and toss well.   Transfer to warm serving bowl and top with grated parmesan cheese.
 
Makes two to four servings.   (Usually I double this recipe)
 
Per serving:   387 calories, 798 mg sodium
0 Comments

Popcorn Cake

11/1/2019

0 Comments

 
Picture
This cake became popular in the 1930s Depression era, when sugar and other items normally used for baking cakes were a luxury.  Assemble all items to make ‘The Glue’ and add ‘The Stuff’ as, once the process starts, one must work quickly (forget about answering the phone or doorbell).  To serve, tear cake apart in chunks (it is too difficult to cut with a knife).  Keeps well.  Ships well.

Note from Brian: Hilda made this cake for us, and it was wonderful. It's interesting how our foods change over time, and how what we cook changes, and why, such as in the Depression. This cake was strangely addicting and I kept going over and getting another slice. It was a nice mix of salty, sweet, and crunch.
The Glue:
1 stick butter (4 ounces)
1/2 cup oil
16 ounces marshmallows
Salted or unsalted butter – makes no difference.
Recommended:  canola oil.
Large or small marshmallows - makes no difference.
The Stuff:
16 cups popped popcorn,
   fully popped kernels only
6 to 8 ounces salted
   Spanish peanuts
12 to 16 ounces
   semisoft candy
Use large-kernel (gourmet) popcorn.
Do not use microwavable popcorn bags.
After trying many kinds of salted nuts, author always returns to using Spanish peanuts (redskins).  They’re best.
Vary candy for seasons/holidays:
  • spice drops for Christmas
  • red/white jelly beans for Valentine (tint glue pink)
  • jelly beans for Easter
  • candy corn for Halloween
Do not use hard-coated candies, such as M&Ms.
Preparing the Popcorn:
​Dry-pop several batches of popcorn and throw it into a large heavy stockpot (not smaller than 8-quart size).  Using both hands, loosely sift popped corn and throw only large, plump popped kernels into an angelfood cake pan, filling pan a little higher than its rim (this will be 16 cups).  Discard unpopped and partially popped kernels and loose husks and wipe out the stockpot with a paper towel.
Preparing “The Glue”:
​Over low heat, melt butter in oil in stockpot, and, using a large, sturdy buttered wooden spoon (buttering should go half-way up the spoon handle), add marshmallows and quickly and vigorously stir until marshmallows are melted and thoroughly incorporated into butter-and-oil mixture (glue should be white with virtually no oil in evidence).  Remove stockpot from heat and lower stockpot into your kitchen sink to make it easier to add the stuff and to stir it.
​Adding “The Stuff”:
​Toss all of the popped corn into the glue and, using the buttered wooden spoon, quickly turn popcorn over and over and over until it is completely covered with the glue.
 
Add half of peanuts and stir until peanuts stick to popcorn.  Repeat process with remaining half of peanuts.
 
Finally, add all of the candy at once and stir quickly until candy is evenly mixed with the popcorn and peanuts.
 
Note:  It may be tempting to add all of “The Stuff” at once to “The Glue” but refrain from doing so as the:
- mixture will not be distributed evenly
- candy’s food coloring will ‘bleed’ in heat of “The Glue”
It is better to add each ingredient separately as directed.
​Assembling the Cake:
​Butter the angelfood cake pan including the center shaft; also butter your hands (by this time, the mixture will be cool enough to handle, but do not let it sit).
 
Working quickly, gently hand-pack mixture evenly into the buttered angelfood cake pan.  DO NOT PRESS HARD as cake will become compacted and hard to tear apart and eat.
 
When rim is reached, gently press mixture so that the top is flat, as the top becomes the bottom when cake is turned out.
 
Cover the top of the angelfood cake pan with foil and let it sit on a countertop overnight or at least for a few hours.
Preparing the Cake
   for Eating:
Loosen cake from pan with a table knife; turn cake out onto the foil, pushing the foil around the bottom of the cake.
 
Wrap cake immediately with two crosswise pieces of clear plastic wrap, and, if cake is a gift, tie it with a ribbon.
EnJOY
0 Comments

    Archives

    May 2021
    March 2021
    January 2021
    December 2020
    November 2020
    October 2020
    September 2020
    August 2020
    July 2020
    June 2020
    May 2020
    April 2020
    March 2020
    February 2020
    January 2020
    December 2019
    November 2019
    October 2019
    September 2019
    August 2019
    July 2019
    June 2019

    Categories

    All

    RSS Feed

affiliate_link