 Image by Mohamed Hassan from Pixabay While I am mainly going to write about Square, there are other companies that do the same thing. Since we use Square though, and others probably perform similarly, I’ll start there.
Last year at the Studio Tour, Windstream went down in our area for most of the day. We were using StarLink at the time, so the folks at our stop were able to continue using their card readers. I think everyone taking CC’s were using Square, partly because that’s what we know so that’s what we recommend. A link to their website is HERE. Aside from the opportunity to bash Windstream, I want to add that the folks at our stop this year were using Square again. This time though, they didn’t need the Square reader which attaches to your smartphone, instead, they were able to use the phones NFC chip to read credit cards. It was very cool to see that. Basically, after ‘ringing up’ the charge, it prompts for the card and you slip it behind the phone and the Square software reads the card. It was impressive. I’m sure there are alternatives to Square, feel free to read about some HERE. There are a million ways to easily transfer money, Western Union, PayPal, Google Pay, Zelle, and more. We use Zelle most often. Once you set it up, it’s pretty straightforward. Like everything else, there are nuances to get used to, but then it’s easy-peasy. Receiving the money takes some setup as well, but again, once that is done, it’s done and the money goes where it’s setup to go. Since there are various apps for that as well, I’m including some more informative reading HERE. Deposit your checks without going to the bank. Yes, that’s right. Do you still drive somewhere to deposit a check someone gives you? You may not need to. Many banks these days have an option to deposit checks via a photo sent from your smartphone. Download your banks app for that, and follow the instructions. The software will guide you through the process and tell you when to take a pic of the front and back of the check. Assuming it’s a good pic and a good check, it will deposit the money into your account. Following is a link that helps explain the process further, HERE. I’m always on the lookout for next Friday’s tech tip. Sometimes I’ve got one from my actual experience that week, and other times I try and find something interesting. This week I searched and found one I like, about other people’s favorite tech tips.
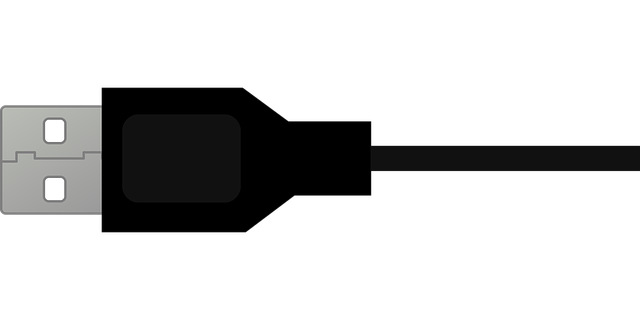
This week’s particular tech tip involves 20 “experts” chiming in on what they like. Some are pretty standard, like password managers and keyboard shortcuts, but others are more involved like learning how to use AI and basic programming skills. I’ve wanted to learn how to program on Linux, so maybe I’ll get motivated to do that. Read about the experts tech tips right HERE. 20 Experts’ Smart, But Simple, Tech Tips For Everyday Users (forbes.com) My daughter suggested writing about this subject. Since I am asked for cables from time to time, I thought it was a good idea. There are many different types of USB cables and they are very common. So many devices use USB in some format or other, it gets confusing when you need a cable. Printer cables were often using the square-ish Type b, which had the standard Type A on the other end.
The designations aren’t so helpful to us regular people, though differentiating between a USB Mini or Micro is helpful. Generally, a non-Apple smartphone was using a Micro. The early Kindles used a Mini. These days it seems that the USB-C is taking over. It would be nice to have a standard. The USB cable used to carry data and sometimes, a little bit of power. It quickly became a carrier of more power which makes it more useful. Generally, it tends to carry 5 volts of power, and usually about 3 amps, so not a huge amount, but enough to run many small devices. Not enough to run my laser printer, but plenty to power speakers, external drives, cameras, that sort of thing. If you are interested in reading more and seeing what the various types of USB cables look like, then read this LINK. Understanding USB Cable Types and Which One to Use (makeuseof.com) It will help if you need one and want to see if I have any. I probably do. We often hear or see posted "My Facebook Account has been hacked". Usually that is NOT the case but someone has cloned your account and is trolling for friends.
This is an excellent article by Rick Rouse. Check out his daily tech tips and subscribe to his blog. By Rick Rouse By now you probably know that Facebook accounts are getting cloned by scammers right and left these days. Luckily, having a scammer clone your account isn’t as bad as having someone hack into it, but it’s still bad – especially for the people on your friends list. In case you’re unfamiliar with account cloning, it’s where a scammer creates a completely new Facebook account in your name and populates it with photos and personal information they’ve copied from your real account. They then use the new fake account to send friend requests to all the people on your real account’s friends list. And since it appears to the friends receiving the friend requests that they were sent by you, some of them will accept it. This of course results in those friends now also being “friends” with the fake account that was created by the scammer. Scammers typically try to target accounts for cloning that have a fairly large number of friends, but not always. ANY Facebook account is at risk of being cloned, and that includes YOURS! Luckily, there’s one simple settings change that can make your account very unattractive to a potential scammer who might be interested in cloning it… Hide your friends list from the public by changing its privacy level to Only me. Setting the privacy of your friends list to “Only me” makes it an unattractive target for cloning because the scammers wouldn’t know who to send friend requests to from the cloned account. And if a scammer can’t add friends to a cloned account it’s virtually useless to him/her. If you’d like to greatly reduce the risk of your own Facebook account getting cloned in the future, just follow the steps below that match the device you’re using to hide your friends list from the public. If you access Facebook via a web browser on a laptop or desktop computer: 1 – Log in to your Facebook account and visit your Timeline page. 2 – Click the Friends link. 3 – Click the three dots located just to the right of the “Find Friends” link. 4 – Click Edit Privacy. 5 – On the line that reads “Who can see your friend list?“, click the down arrow at the far right and select Only me. If you use the Facebook app on a mobile device: Note: The exact steps required to hide your friends list might vary a bit from the ones below, depending on your version of the Facebook app. If so, use the following steps as a general guide. 1 – Open the Facebook app and sign in to your account. 2 – Tap your profile avatar picture in the top-right corner of the screen. 3 – Scroll down and tap Settings & Privacy. 4 – Tap Privacy shortcuts. 5- Tap See more privacy settings. 6 – Scroll down to the “Audience and visibility” section and tap How people find and contact you. 7 – Tap Who can see your friends list? and change that setting to Only me. That’s all there is to it. Now that your friends list is private there’s very little risk that it will ever get cloned by a scammer. Note: The setting you just changed won’t hide your list of mutual friends from someone you are already friends with. However, most scammers who clone Facebook accounts are strangers, not someone who is on your Friends list. |
Tech TipsThere's a lot of fake information out there. Please be scrupulous about what you share on Facebook and other platforms. Here are some trusted sources. Please don't rely on social media for your information.
Abiquiu Computer Recycling
Abiquiu Computers gives away available computers for FREE. We recover used pc’s and upgrade them, repair them, refurbish them so they may have another life with someone else. CategoriesArchives
October 2025
|


 RSS Feed